You can change the name on your QESCO electricity connection online in just a few easy steps. If you have bought a new property or need to update the name for legal reasons, this guide will help you. Just follow the steps below to complete the process smoothly.
9 Steps To Change The Connection Name In QESCO
Follow the step by step guide to change the connection name:
Step 1: Visit the Official Website
The first step in changing your QESCO connection name is to visit the official website. Open your preferred web browser and go to https://enc.com.pk/. This is the platform where you can initiate and track your request.
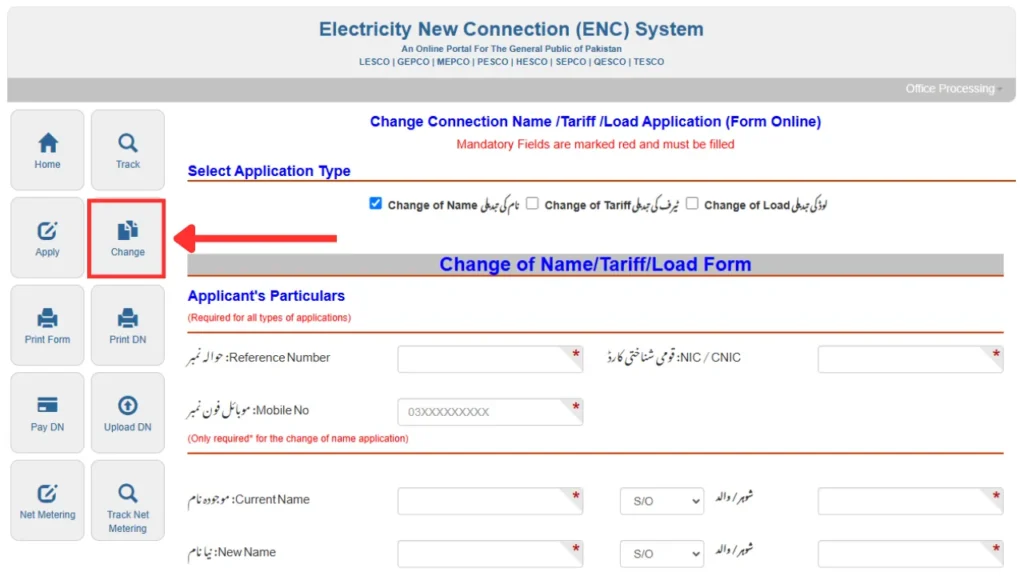
Step 2: Access The Change Name Option
Once you are on the website’s homepage, navigate to the left-hand sidebar, where you will find multiple service options. Locate the “Change” button specifically meant for name change requests. Click on it to begin your application process.
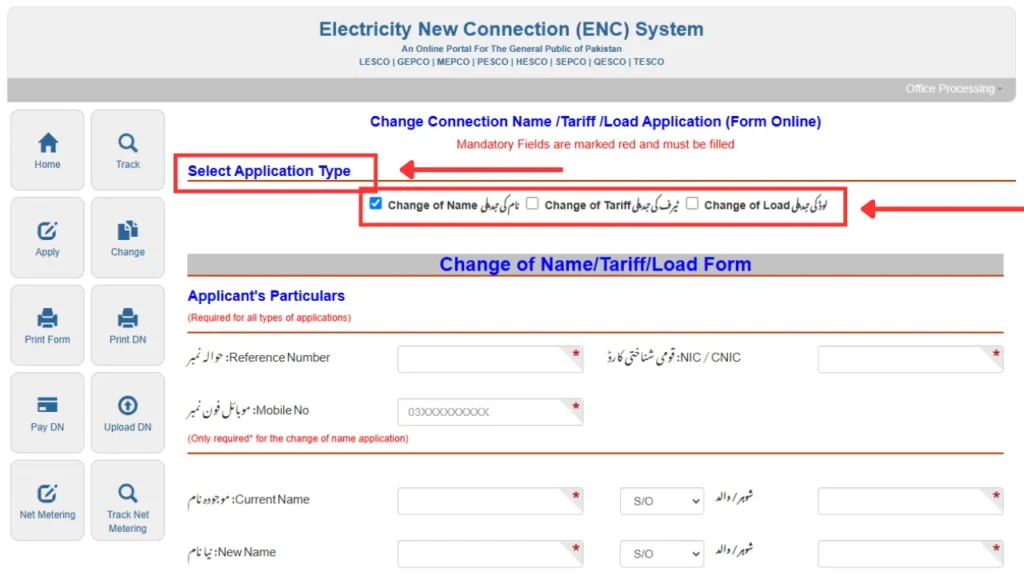
Step 3: Select Application Type
After clicking the change button, you will be prompted to select the type of application you want to submit. You will see three available options. Choose “Change of Name”, as this is the relevant selection for updating the registered name on your connection. This step ensures that your request is categorized correctly for processing.
Step 4: Enter Your Details
To proceed, you must enter accurate personal and connection-related details. These include:
- Reference Number: This unique identifier can be found on your electricity bill and helps QESCO track your account.
- NIC/CNIC Number: Your National Identity Card (CNIC) number must be entered correctly to validate your identity.
- Mobile Number: Provide an active mobile number to receive updates and notifications regarding your application status.
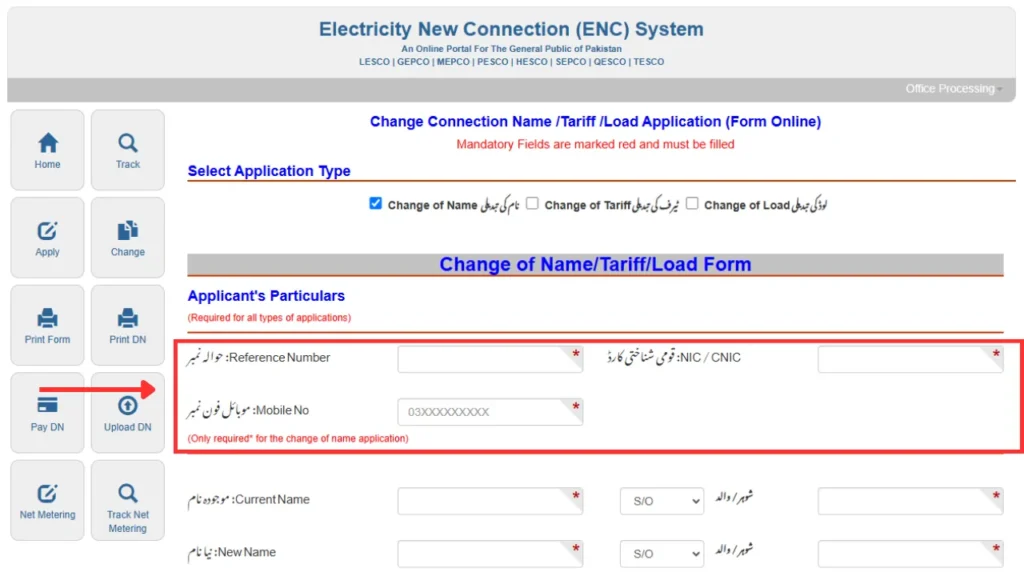
Ensure that all details are correct before moving on to the next step, as any mistakes may cause delays in processing your request.
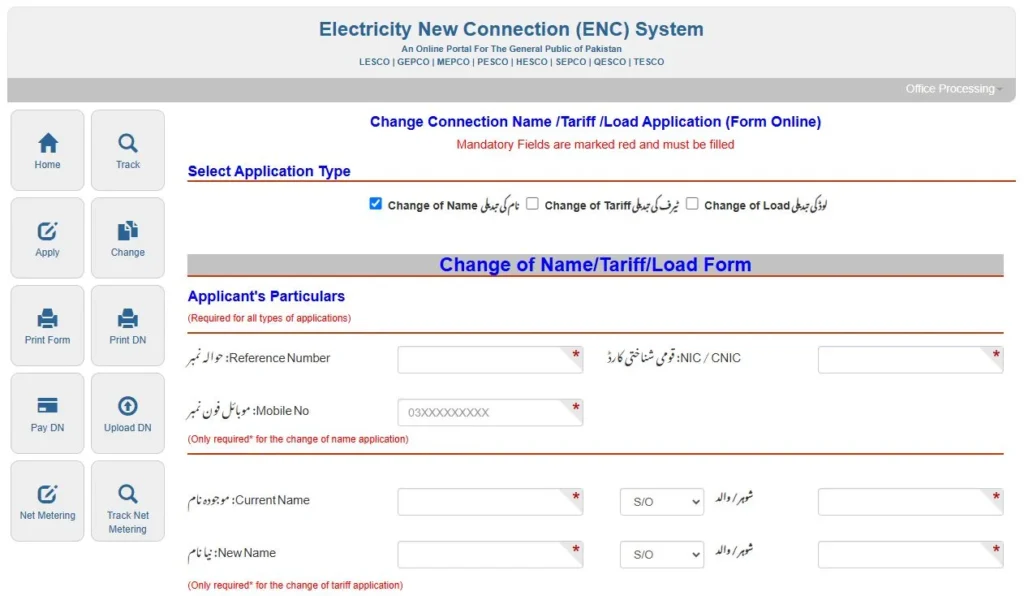
Step 5: Provide Current and New Name Information
Now, enter the details of the existing and new name to be updated on the connection. This includes:
- Current Registered Name: The name currently associated with the electricity connection.
- Husband/Father’s Name (Current): The father or husband’s name as per the existing records.
- New Name: The new name you want to update on the connection.
- Husband/Father’s Name (New): The father or husband’s name corresponding to the new name.
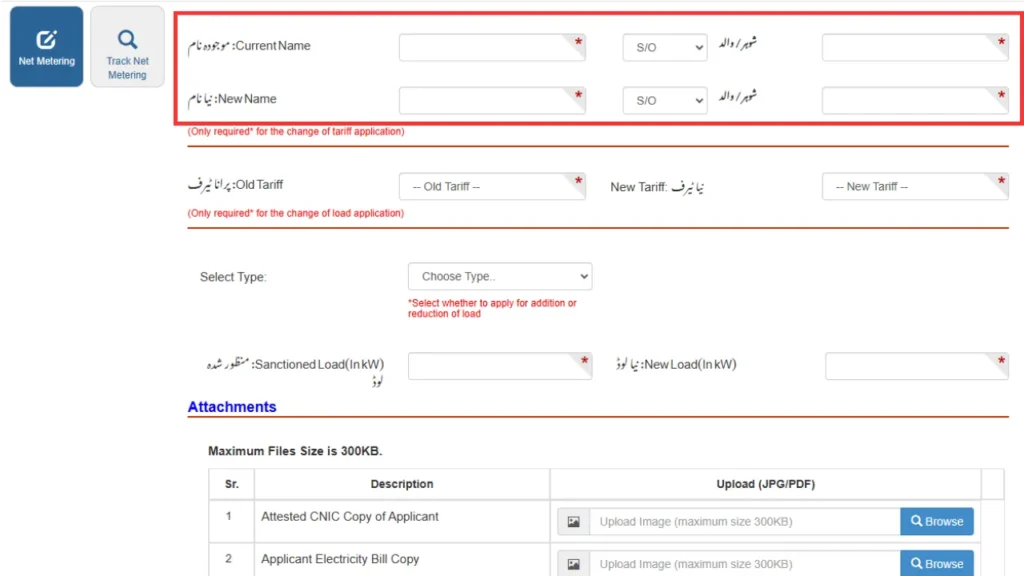
It is important that these details match official identification documents to avoid complications.
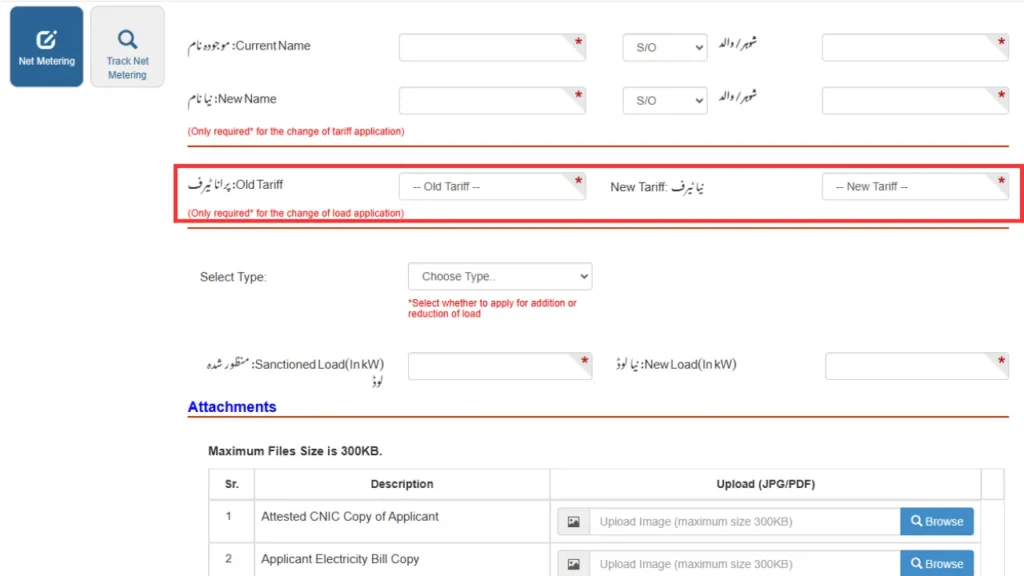
Step 6: Select Tariff Details
In this step, you must specify the tariff category associated with your connection. Select both the current tariff and the new tariff that you wish to apply. Tariff categories define your billing structure, so ensure that you select the correct one to avoid future issues.
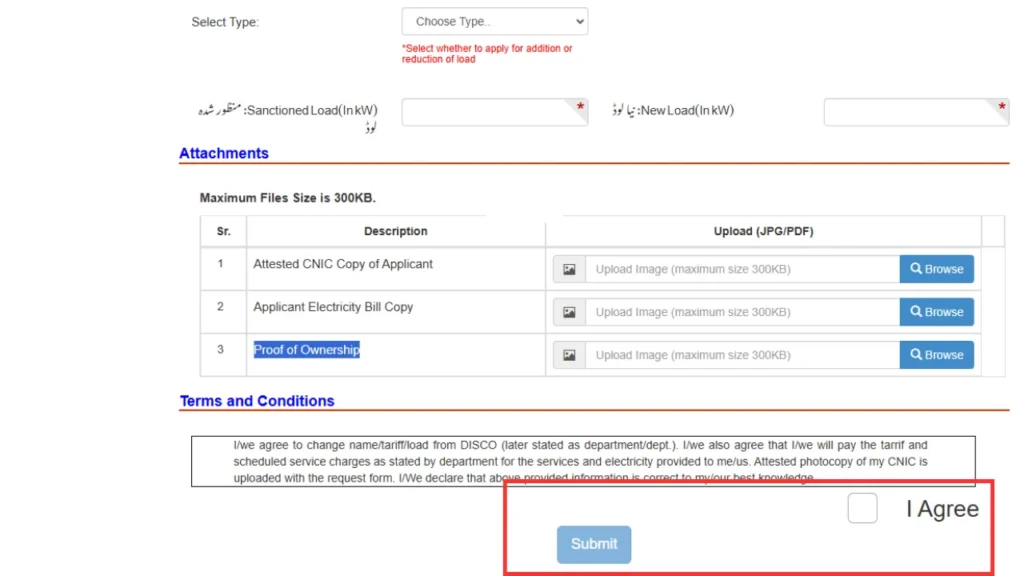
Step 7: Specify Load Changes (If Applicable)
If you need to modify the sanctioned load of your connection, you can do so in this step. From the dropdown menu, select whether you want to increase or decrease the load. Then, enter:
- Current Sanctioned Load (in kW): The amount of power currently sanctioned for your connection.
- New Required Load (in kW): The new power load you are requesting.
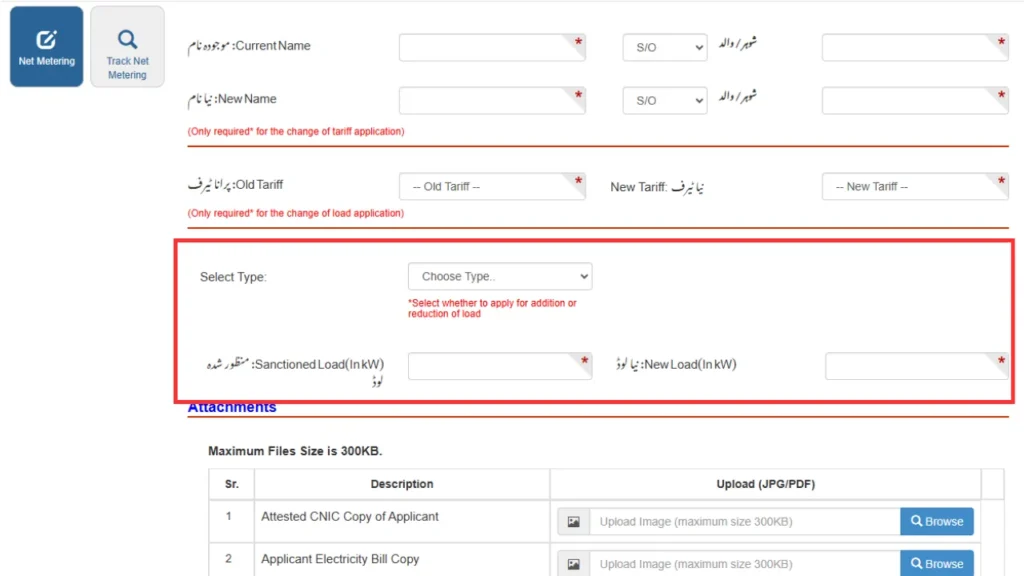
Providing accurate information here is crucial, as any discrepancy might lead to processing delays or rejection of your application.
Step 8: Upload Required Documents
To verify your request, you must upload clear and attested copies of the following documents:
- Attested CNIC Copy of the Applicant: A government-issued identity document proving your credentials.
- Recent Electricity Bill of the Applicant: This bill should be for the connection where the name change is being requested.
- Proof of Ownership: Documents such as property deeds, sale agreements, or other legal proofs showing that you have the right to request a name change on the connection.
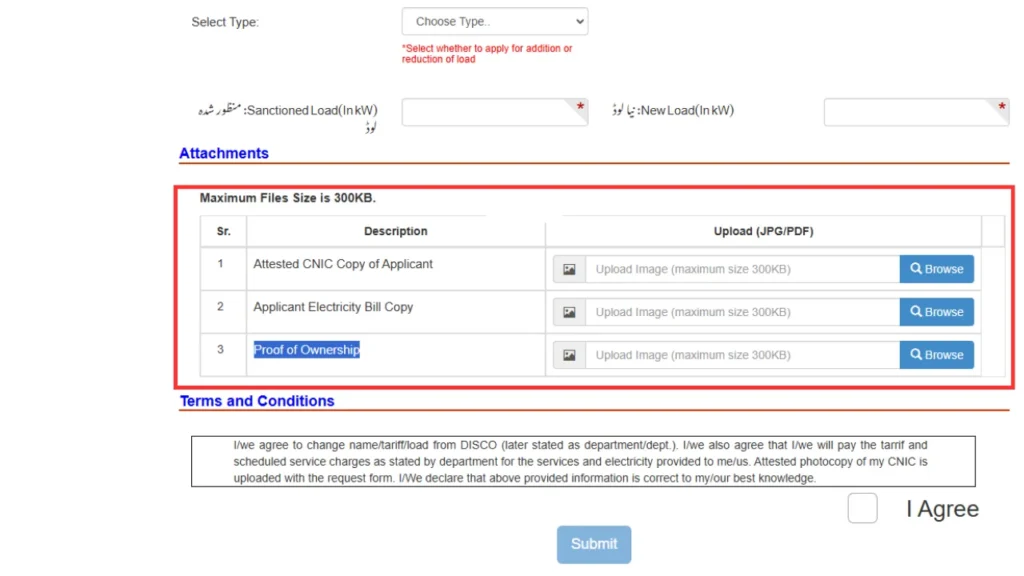
Ensure that all documents are legible and properly attested before uploading them to avoid any issues with verification.
Step 9: Agree and Submit
Before finalizing your application, carefully review all the details you have entered. Make sure that all information is accurate and that the uploaded documents are correct. Once satisfied, check the agreement box to confirm your acceptance of the terms and conditions. After that, click the Submit button to complete the process.
Upon successful submission, you will receive a confirmation message along with a tracking ID. You can use this tracking ID to monitor the progress of your application.
More: